|
|
- Access the Settings Page (tap here to learn how)
- Scroll down to and tap the "Date/Time Format" row.
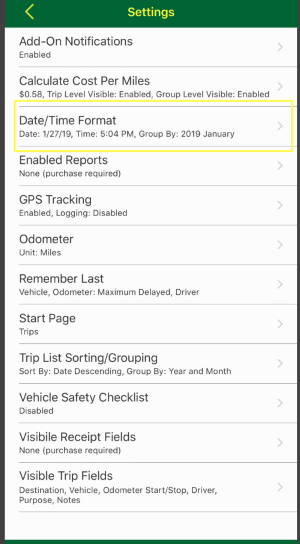
- Then tap the "Time" row.
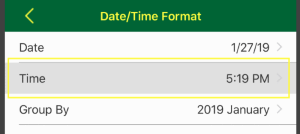
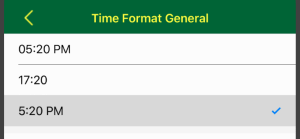
- A list of formats will load, you then tap the row with format you would prefer.
|
- First group the trips by business, client, destination, driver, origin, purpose, status, mileage type, vehicle or year and month. Tap here to learn how.
- Next if needed, apply a filter the trips to limit the report. Tap here to learn how.
- Finally, export the report Tap here to learn how.
|
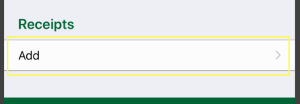
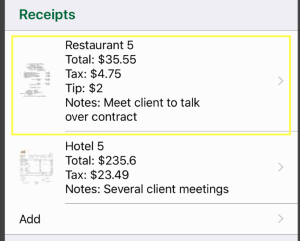
- If you want to add a receipt:
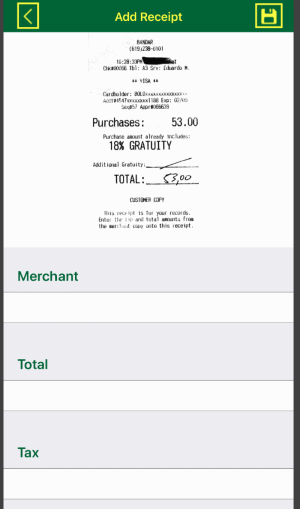
- While adding or updating a trip, scroll down to the "Receipts" section and tap the "Add" row.
- Next you can choose to take a picture of the receipt or select it from your camera roll if an image already exists.
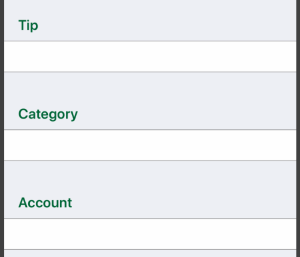
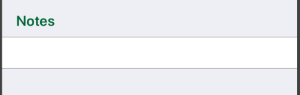
- In additional to adding the receipt, you can also enter the merchant, total, tax, tips, category, account and notes.
- After entering the details, tap the
 button to commit your changes or tap the button to commit your changes or tap the  button to lose any changes. button to lose any changes.
Note: you still need to save the trip.

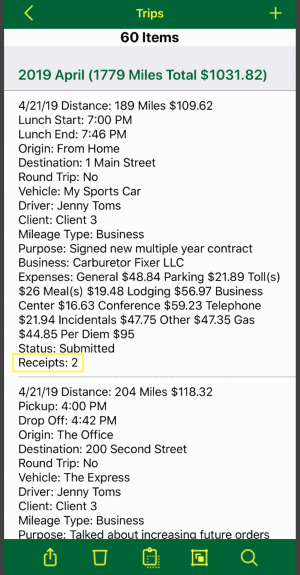
- Once saved, the Trips screen will display the count of receipts for each trip
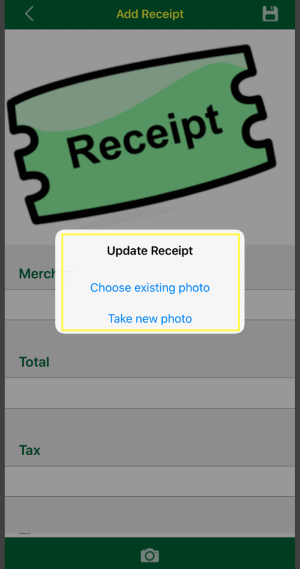
- To update a receipt
- Scroll down to the "Receipts" section and tap the receipt
- Then update the receipt by tapping the
 button on the toolbar at the bottom. button on the toolbar at the bottom.

- After entering the details, tap the button to commit your changes or tap the button to lose any changes.
Note: you still need to save the trip.
- To delete a receipt
- Scroll down to the "Receipts" section and tap the receipt
- To delete the receipt tap the
 button on the toolbar at the bottom button on the toolbar at the bottom

Note: you still need to save the trip.

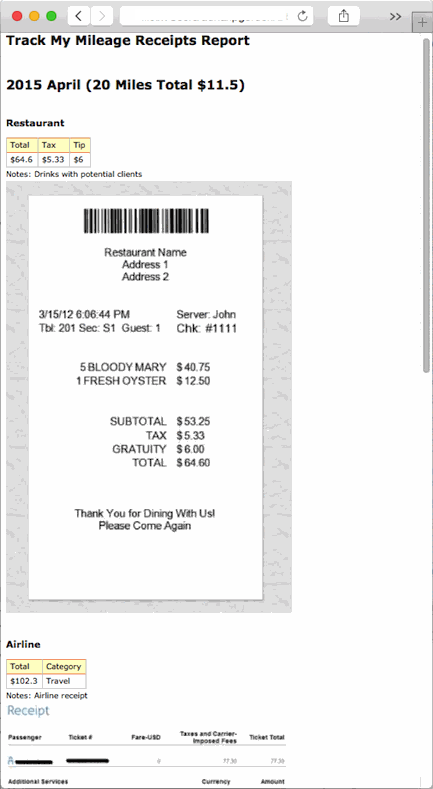
When you export your trips, all receipts for those trips will be included in a single yet separate file from the report of your trips.
|
|
The taking of pictures of receipts and add them to a trip is a feature that can be added by following these steps:
- Access the TMM Store (tap here to learn how)
- Scroll down to the "Single Items" section and tap on the "Add Basic Receipt Tracking" row but if you want to see any discounted bundles that include this add-on then:
- Tap the
 button in the upper right corner to open the store assistant button in the upper right corner to open the store assistant
- Then scroll down to and tap the Basic Receipt Tracking row
- Next tap the button to return to the filtered store listing
- Finally tap the add-on you are interested in from the bundles or single items section
- The details page will open where you can read more about add-on and view screenshots. When you are ready to make the purchase then tap the
 button in the upper right corner and follow any prompts provided by Apple to complete the purchase. button in the upper right corner and follow any prompts provided by Apple to complete the purchase.
|